Freycob

"Good Food Made Easy"

  • Home
  • Recipes
    • Bread and Pastry
    • Cakes & Muffins
    • Chutneys, Jams, Relishes and Sauces
    • Desserts & Puddings
    • Drinks
    • Fish
    • Main Meals
    • Soups, Starters and Snacks
    • Sweets and Teatime Treats
    • Veg on the side
  • Reviews
    • Book Reviews
    • Equipment
    • Events
    • Food & Drink
    • Products
    • Restaurants
  • Competitions & Giveaways
  • Who is Freycob?
  • Contact Me
  • Privacy & Cookies Policy

Typically Tropical Bundt© Cake

28th October 2016 by Rosie

When you’ve been sent some bottles of refreshing Grace Foods Aloe Drink to try and you want explore what you can do with it, apart from enjoy drinking it, then what else can you do, except make a deliciously moist and tasty cake?

Grace Foods Aloe Refresh Aloe Vera Drink

Well, this is exactly what happened recently and exactly what I did. So, read on, get your apron on, your ingredients out and enjoy some time in the kitchen before tucking into a slice (or two) of this deliciously moist cake.

Typically Tropical Bundt© Cake

Cake:

  • 85g Unsalted butter
  • 180g Caster sugar
  • 2 medium sized eggs
  • 1tsp Nielsen Massey Vanilla Extract
  • 60ml Coconut milk
  • 30ml Farringtons Yellow Mellow Rapeseed oil
  • 180ml Mango purée
  • 190g Plain flour
  • ¼tsp Salt
  • ½tsp Bi-carbonate of soda
  • ½tsp Baking powder

Glaze:

  • 50g Caster sugar
  • 60ml Grace Mango flavoured Aloe Refresh Aloe Vera Drink

Icing:

  • 2½tsp Grace Mango flavoured Aloe Refresh Aloe Vera Drink
  • 100g Icing sugar
  • ½tsp Mango purée

Typically Tropical Bundt© Cake

  1. Heat the oven to 160ºC (140º Fan).
  2. Butter and flour a 6 cup Bundt© tin.  I used the Nordicware Anniversary tin that you can find on Amazon.
  3. In a stand mixer, or using an electric whisk, cream the butter and sugar for 4-5 minutes until light and fluffy.
  4. Beat in the eggs, one at a time, until fully combined.
  5. Add the vanilla extract, coconut milk, rapeseed oil and 120ml of the mango purée and beat thoroughly for 4-5 minutes on a medium speed until it has increased in volume and is creamy.
  6. In a separate bowl, sieve together the flour, salt, bi-carbonate of soda and baking powder.
  7. Mix half of the flour into the wet mixture until just combined.
  8. Add the remaining 60ml of the mango purée and fold together.
  9. Fold in the final half of the flour gently.
  10. Pour the mixture into your Bundt© tin and smooth the surface level.
  11. Bake for 65-70 minutes until the cake has just started to shrink from the edges of the tin and a skewer comes out clean when inserted into the thickest part of the cake.
  12. Allow to cook in the tin for 5 minutes, whilst you make the glaze.

Typically Tropical Bundt© Cake

  1. In a small saucepan, heat the caster sugar and Aloe Vera Drink until boiling, then reduce the heat to a rolling boil and the syrup has reduced by half.
  2. Using your skewer, make a series of small holes in the flat surface of the cake and slowly spoon half of the glaze over the cake, allowing it to soak in fully.
  3. Invert the tin onto a wire cooking rack and prick the top with your skewer all over then, gently and slowly spoon the other half of your glaze over the top of the cake, again allowing it to soak in fully.

Typically Tropical Bundt© Cake

  1. Leave the cake to cool completely.
  2. Mix together the Aloe Vera Drink and mango purée, then sieve the the icing sugar into it, mixing thoroughly until you get a thickish icing.
  3. Gently pour the icing over the top of the cake, allowing it to drizzle down the outside edge and into the centre hollow.

Typically Tropical Bundt© Cake

You can find mango purée and coconut milk in the international food aisle of your local supermarket.  I tend to use my Kenwood Major Titanium stand mixer to make cakes in if it involves beating the mixture for several minutes as it leaves me to get on with setting up the next stage of my preparation.  If it’s something that only needs a very quick mix, then I use my Kenwood K-Mix hand mixer instead.

Grace Foods sent me some bottles of their Aloe Refresh Aloe Vera Drinks to sample.  I was under no obligation to develop any recipes or provide a review of their products in return for these drinks. 

Filed Under: Afternoon Tea, Aloe Vera, Autumn, baking, baking powder, bicarbonate of soda, Billingtons, Blogger, Bundt, butter, cake, cakes, caster sugar, coconut, Coconut milk, drizzle, Egg, Farringtons Cold Pressed Rapesed Oil, Food Blogger, Freycob's Cakes, Fruit, Fruit Cake, Grace Foods, icing, icing sugar, K-Mix, Kenwood, Major Titanium, Mango, Nielsen Massey, Nordic Ware, Rapeseed Oil, Recipe, sugar, vanilla Tagged With: Aloe Vera Drink, Blogger, Bundt, Cake, Coconut milk, Farringtons Yellow Mellow, Food Blogger, Grace Foods, K-Mix, Kenwood, Mango, Nielsen Massey, Nordicware, Recipe, Treats, Vanilla

Coffee Viennese Whirls

22nd June 2016 by Rosie

Whilst I’ve been off work recovering from last Friday’s knee surgery for the last couple of days, boredom is taking its’ toll. I can’t stand for long periods.  I can’t drive, and can only walk very short distances. What I can do, though, is browse the internet for ideas from inspirational people.  My friend Lynn over on Ink Sugar Spice, shared a delicious recipe recently for Pistachio and Mascarpone Cream Viennese Sandwiches. I have no pistachio paste, but I do have (and love) Nielsen Massey Coffee Extract, and as well all love coffee in this house, it was a done deal!

Digging out my old trusty Be-Ro recipe book that my mum bought me many, many years ago (it was my first ever cook book). I know that this recipe works as I’ve used it lots in the past.  Just a tweak and a little twist was all it needed to produce these deliciously crumbly and delicately tasting biscuits.

Coffee Viennese Whirls
Biscuits:

  • 225g Butter at room temperature (it needs to be soft)
  • 75g Icing sugar
  • 2.5ml Ndali vanilla powder
  • 2.5ml Douwe Egberts coffee
  • 225g Self raising flour

Filling:

  • 60g Philadelphia cheese
  • 40g Butter
  • 150g Icing sugar
  • 2.5ml Nielsen Massey Coffee Extract
  1. Line two baking trays with parchment paper.
  2. Beat the butter and the icing sugar together for 3-4 minutes until light and airy.
  3. Grind the vanilla powder and coffee together until very fine.
  4. Add to the butter and icing sugar mix along with the flour.
  5. Stir until very well combined. This should produce a fairly stiff paste.
  6. Place a large star nozzle in a piping bag and place the biscuit mixture into the piping bag.
  7. Pipe an even number of circles of the biscuit mixture onto the parchment paper and place into the fridge to chill for 30 minutes.
  8. Preheat the oven to 160℃ (fan), 180℃ conventional.
  9. Place the baking tray into the oven for 15 minutes until the biscuits are pale in colour.
  10. Remove from the oven, but leave the biscuits on the trays to cool for 5 minutes.
  11. Transfer the biscuits to a cooling rack and leave until cold. (These biscuits are very ‘short’ and therefore quite delicate, so handle them gently).
  12. Beat the Philadelphia cheese, butter, icing sugar and coffee extract together until smooth.
  13. Transfer the filing mixture to a piping bag and pipe a circle on to half of the biscuits.  Sandwich the other half of the biscuits together.
  14. These will keep for a couple of days in the fridge (store them there, due to the butter and Philadelphia), but allow them to come back to room temperature to improve the flavour and smooth texture of the filling.

Coffee Viennese Whirls
Thanks to Lynn for giving me the inspiration to play with this old recipe and to give it a different little twist.

Filed Under: Afternoon Tea, baking, Be-Ro, biscuit, Blogger, butter, coffee, flour, Food, Food Blogger, icing sugar, Ndali Vanilla, Nielsen Massey, Philadelphia cheese, Recipe, Recipe book, vanilla Tagged With: Biscuits, Blogger, Butter, coffee extract, Douwe Egbert, Dust and Things, Food Blogger, Ndali, Nielsen Massey, Philadelphia Cheese, Recipe, Teatime, Treats, vanilla powder, Viennese Whirls

Vanilla Loaf with a Rhubarb, Lemongrass and Ginger Jam Swirl

6th October 2014 by Freycob

Having only 3 sticks of rhubarb left in my garden and knowing there wasn’t anywhere near enough to make my husband’s favourite crumble with, it had to be used in something as a flavour element, so what better way to do this than with a loaf cake, made with locally produced Rapeseed Oil instead of butter.

Jam
3 sticks Rhubarb, washed
30ml Bottle Green Ginger and Lemongrass cordial
2.5ml Ground ginger
50ml Water
15ml Demerara sugar
2.5ml Nielsen Massey vanilla paste
Cake
225g Self Raising flour
225g Caster sugar
180g Farringtons Mellow Yellow rapeseed oil
45g Single cream
1.25ml Baking powder
2.5ml Nielsen Massey vanilla paste

1. Heat the oven to 180˚C.
2. Without peeling your rhubarb, cut it into 2cm pieces.
3. Add to a saucepan with the cordial, ground ginger, water, sugar and vanilla paste.
4. Bring to the boil and then simmer for 10-15 minutes until thickened.
5. Remove from the heat and allow to cool.
6. In a large mixing bowl weigh out the flour, caster sugar, rapeseed oil and cream then measure in the baking powder and vanilla paste.
7. Beat on a high speed until thoroughly combined and light.
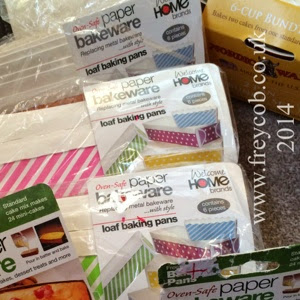
8. Divide the cake mix into 3 cardboard loaf pans (mine were from America and were 6.5cm x 18cm x 5cm deep)

9. Divide the rhubarb and ginger jam into 3 and spoon onto the top of each of your loaves.  Swirl the jam through gently to distribute and create a pattern when it’s cooked.

10. Bake for 40 minutes until a skewer inserted into the centre of the loaf comes out clean.
11. Remove from the oven and allow to cool in the cases.

12. These can be served from the cases or presented as a gift, wrapped in cellophane and tied with a ribbon.

Filed Under: Bottle Green, cake, ginger, Lemongrass, Rapeseed Oil, Recipe, Rhubarb, vanilla

Chocolate Fudge Cake

6th January 2014 by Freycob

This is an incredibly moist chocolate cake that’s not too sweet.  The chocolate fudge icing is a wonderful topping which balances it out perfectly.

300g Plain flour
1/4 tsp salt
450g Granulated sugar
2 Eggs
5ml Bicarbonate of Soda
125ml Milk
15ml Lemon Juice
250ml Water
250g Butter
3tbs Cocoa
5ml Vanilla
Icing:
150g Butter
30ml Water
5ml Vanilla
30ml Cocoa
325g Icing sugar

1. Heat the oven to 180C
2. In a large bowl, mix together the flour, salt, sugar, eggs, bi-carbonate of soda, milk and lemon juice.
3. Set aside for 5 minutes, whilst you:
4. Heat the water, butter, cocoa and vanilla extract together until the butter has melted.
5. Add the butter and water mix to the bowl and mix well to combine.
6. Grease a 25x30cm deep dish.
7. Pour the cake batter into the dish.
8. Cook for approximately 25 minutes until a skewer comes out clean.
9. Remove the cake from the oven and leave to cool in the dish.
10. Melt together the butter with the water and vanilla.
11. In a large bowl, mix together the icing sugar and cocoa.
12. Add the water and butter mixture into the icing sugar and cocoa and beat until thoroughly mixed, with no lumps.
13. Pour over the cake and leave to set.

I chose to make this for my daughter’s 13th birthday in a bundt tin.  After cooking, I left it in the tin for 10 minutes before turning out on to a cooling rack until cold.  It was then transferred to a cake stand and the fudge icing poured over the top.  If you leave the fudge icing to set and cool for a few minutes you will find that it thickens up a bit and therefore coats the cake better.

Filed Under: Birthday, Bundt, butter, cake, chocolate, cocoa, flour, fudge, lemon juice, Recipe, sugar, vanilla

Next Page »

Find me here too

Facebooktwitterpinterestinstagramflickrmail

Search Freycob.co.uk

Foodies100 Index of UK Food Blogs
Foodies100
blogl
World Baking Day Ambassador 2013
alldishes.co.uk

Tag Cloud

baking BBC Good Food Show beef Birthday Blogger Blogger Challenge Blogger Event butter Buttercream cake cakes carrot Central Co-Op Central England Co-Operative cheese Chicken chocolate cinnamon Competition Cream Dinner Family meal flour fondant Food Food Blogger Food Review garlic ginger Giveaway Kenwood lemon Meal Meat onion potatoes PR Rapeseed Oil Recipe Review sugar Uncategorized vanilla vegetables Wine

Previous posts

  • June 2020 (1)
  • February 2020 (1)
  • October 2018 (1)
  • April 2017 (2)
  • November 2016 (9)
  • October 2016 (3)
  • September 2016 (2)
  • July 2016 (1)
  • June 2016 (7)
  • May 2016 (2)
  • April 2016 (2)
  • March 2016 (2)
  • February 2016 (3)
  • January 2016 (3)
  • December 2015 (2)
  • November 2015 (3)
  • September 2015 (1)
  • August 2015 (1)
  • July 2015 (5)
  • June 2015 (4)
  • May 2015 (4)
  • March 2015 (4)
  • February 2015 (7)
  • January 2015 (2)
  • December 2014 (6)
  • November 2014 (11)
  • October 2014 (10)
  • September 2014 (6)
  • August 2014 (6)
  • July 2014 (4)
  • June 2014 (7)
  • May 2014 (4)
  • April 2014 (5)
  • March 2014 (3)
  • February 2014 (3)
  • January 2014 (6)
  • December 2013 (8)
  • November 2013 (5)
  • October 2013 (10)
  • September 2013 (5)
  • July 2013 (1)
  • June 2013 (3)
  • May 2013 (6)
  • April 2013 (2)
  • March 2013 (2)
  • February 2013 (1)
  • January 2013 (1)
  • November 2012 (1)
  • October 2012 (3)
  • September 2012 (1)
  • August 2012 (4)
  • July 2012 (10)
  • June 2012 (9)
  • May 2012 (4)
  • April 2012 (2)
  • March 2012 (2)
  • February 2012 (2)
  • December 2011 (2)
  • November 2011 (1)
  • October 2011 (4)
  • June 2011 (3)
  • May 2011 (1)

Follow Me here too

Facebooktwitterpinterestinstagramflickrmail

Subscribe to Blog via Email

Enter your email address to subscribe to my blog and receive notifications of my new posts by email.

Categories

Copyright © 2025 · Foodie Pro Theme by Shay Bocks · Built on the Genesis Framework · Powered by WordPress

This website uses cookies to improve your experience. We'll assume you're ok with this, but you can opt-out if you wish.Accept Read More
Privacy & Cookies Policy
Necessary Always Enabled