Freycob

"Good Food Made Easy"

  • Home
  • Recipes
    • Bread and Pastry
    • Cakes & Muffins
    • Chutneys, Jams, Relishes and Sauces
    • Desserts & Puddings
    • Drinks
    • Fish
    • Main Meals
    • Soups, Starters and Snacks
    • Sweets and Teatime Treats
    • Veg on the side
  • Reviews
    • Book Reviews
    • Equipment
    • Events
    • Food & Drink
    • Products
    • Restaurants
  • Competitions & Giveaways
  • Who is Freycob?
  • Contact Me
  • Privacy & Cookies Policy

Lamb Keema

16th April 2017 by Rosie

Such a simple but deliciously easy dish to prepare using a well stocked store cupboard’s ingredients is my lamb keema recipe.  When I worked for an accountancy practice, one of the clients I used to go out and visit would often feed me some of this for lunch that his wife had made. Bear in mind that they had two young girls who ate this – it would have me almost in tears with the heat – I’m such a wimp!  Be assured that mine is nowhere near as hot as that, but it can be if you want it to!
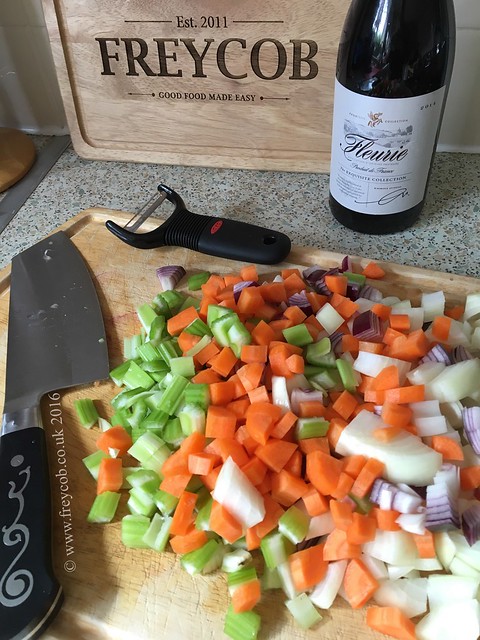
  • 2 medium onions
  • 15ml Rapeseed oil
  • ½tsp Cumin seeds
  • 2 Bay leaves
  • 1-2 chillies (according on taste)
  • 200g tinned tomatoes
  • 2tsp Garlic & Ginger paste (or 1tsp of each)
  • 1tsp Turmeric
  • ½-1tsp Chilli powder (according to taste)
  • 1tsp Garam masala
  • 500g Lamb mince
  • Salt
  • 50g frozen Peas
  • Cup water
  • Fresh Mint
  • Fresh Coriander
  • 4tbs natural yoghurt
  • 2tsp Mint sauce concentrate
  1. Finely chop the onions.
  2. Heat the oil in a large pan.
  3. Add the cumin seeds and bay leaves and fry off for 30 seconds.
  4. Add the onion and cook until starting to brown.  This should take 3-4 mins.
  5. Add the chopped chillies and the tomatoes.
  6. Stir through thoroughly and cook for 1 minute.
  7. Add the ginger and garlic paste, the turmeric, chilli powder, garam masala and mince.
  8. Stir, breaking the mince down to separate it.
  9. Add ¼ tsp salt and the cup of water, along with the frozen peas and stir thoroughly.
  10. Simmer for 20 minutes until cooked and the liquid has reduced by two thirds.
  11. Chop the mint and coriander finely.
  12. Add the herbs to the keema, mix together and cook for 1 minute.

  1. Remove and discard the bay leaves.
  2. Mix the natural yoghurt with the mint sauce concentrate.

  1. Serve the keema with a spoonful of the minted natural yoghurt, along with a naan bread.

Filed Under: Blogger, chilli, coriander, Dinner, Family meal, Food Blogger, garlic, ginger, herbs, Indian, Lamb, Meal, Mince, mint, Mint sauce, onion, Rapeseed Oil, Recipe Tagged With: Chilli, Coriander, Keema, Lamb, mince, Mint, Onions, Peas, Recipe, Rice

Slow Cooked Shin of Beef

3rd April 2016 by Rosie

I’d originally wanted to cook Ox cheek, however neither of my two local butchers had any, and only one had some British shin of beef as an alternative, so that’s what I’ve used for today’s dinner.  I’ve cooked this in 2/3 bottle of Aldi UK Fleurie red wine, from the Beaujolais region of France, but you could use an ale if you prefer.

30ml Rapeseed oil

2 medium onions, chopped

3 medium carrots, chopped

3 sticks of celery, chopped

3 cloves of garlic, bruised

2tbs Plain flour

Salt & pepper

2kg Shin of beef, diced

500ml red wine (or ale)

300ml beef stock

Handful of thyme, roughly chopped

2 Bay leaves

Stick of cinnamon


1. Preheat your oven to 180℃ (160℃ fan).

Slow cooked beef shin in Aldi Fleurie red wine

Slow cooked beef shin in Aldi Fleurie red wine

2. In a large casserole dish, heat 15ml of oil.

3. Fry the onions, carrots, celery and garlic until transparent, but not coloured.

Slow cooked beef shin in Aldi Fleurie red wine

4. Remove the vegetables to a bowl whilst you prepare the beef.

5. In a plastic bag, put the flour and season with salt and pepper.

Slow cooked beef shin in Aldi Fleurie red wine

6. Place the beef into the bag and toss to coat evenly. Shake off the excess.

7. Heat 15ml of oil in the casserole dish and fry the beef in batches until brown on all sides.

8. Remove the beef with the vegetables.

Slow cooked beef shin in Aldi Fleurie red wine

9. Add 100ml of the wine to the casserole dish and scrape the bottom of the dish to release all the flavours.

10. Add the rest of the wine, the beef stock, thyme, bay leaves and cinnamon stick, along with the browned beef and vegetables.

Slow cooked beef shin in Aldi Fleurie red wine

11. Give it a good stir to mix, put the lid on and put the casserole dish into the oven to cook.

12. Cook for 3-4 hours until the beef is tender and falls apart.

13. Remove the bay leaves, cinnamon stick and the garlic cloves.

14. Serve on a bed of chive mashed potatoes with some steamed savoy cabbage.

Slow cooked beef shin in Aldi Fleurie red wine

Filed Under: Aldi, bay leaf, beef, Blogger, British, carrot, Casserole, celery, cinnamon, Dinner, English, Family meal, flour, Food Blogger, garlic, herbs, Meal, Meat, potatoes, Rapeseed Oil, Red Wine, Savoury, Slow Cooker, Thyme, Wine

Meatballs with a Spicy Chilli Sauce

1st October 2014 by Freycob

Similar to my other meatball recipe, I made this today but had a play with the sauce to spice it up using a Knorr Mixed Chilli Flavour pot.
2 medium Onions
3 cloves Garlic
Generous handful of fresh herbs (I used basil, sage, thyme, oregano & parsley)
2 eggs
100g Dried breadcrumbs
500g Minced Beef
Sauce
Small handful of fresh basil, sage & oregano
540g Passata sauce
1 medium Onion
4tbs tomato ketchup
1tbs Tomato purée
2tbs Cider vinegar
Knorr beef stock pot
Knorr mixed chilli flavour pot
Extra Virgin Olive oil

1. In a food processor, place the onions, garlic cloves, herbs and eggs.
2. Blitz until they form a thick, foamy paste.
3. In a large bowl, place your breadcrumbs and mince.
4. Pour your onion, garlic, herb and egg paste onto the mince and breadcrumbs and mix together thoroughly, using your hands.  Then wash your hands.
5. Without the need to wash the food processor bowl, add the sauce herbs, Passata and onion.  Blitz these together until they form a smooth sauce.
6. Pour your sauce ingredients into a large saucepan and add the ketchup, tomato purée and cider vinegar.
7. Mix the Knorr beef stock pot in 500ml boiling water until dissolved.
8. Add this to the sauce mixture with the Knorr mixed chilli flavour pot (I only used half of the chilli pot, but add more or less according to your own personal taste).
9. Bring the sauce ingredients to the boil then reduce the heat to a simmer.
10. Roll your meatball mixture into small balls, about 2cm in diameter.
11. Heat a little olive oil in a frying pan and brown the meatballs all over.  It’s best to do these in batches so that they brown and don’t steam.
12. Transfer your browned meatballs to the sauce and shake the pan to coat.
13. Repeat until all of your meatballs are in your sauce mixture.  Try to avoid stirring the sauce so that you don’t break your meatballs up.
14. Bring a large pan of water to the boil and add your chosen pasta shape. Return to the boil then simmer until cooked to your liking.
15. Drain the pasta and add to your serving bowl.  Spoon some meatballs and sauce over your pasta.
16. Serve with a generous sprinkling of Parmesan cheese.


Filed Under: Basil, beef, garlic, herbs, Knorr, Knorr Flavour pot, Knorr stock pot, meatballs, onions, oregano, Parmesan, Parmigiano Reggiano, Parsley, Passata, Pasta, Recipe, Sage

Find me here too

Facebooktwitterpinterestinstagramflickrmail

Search Freycob.co.uk

Foodies100 Index of UK Food Blogs
Foodies100
blogl
World Baking Day Ambassador 2013
alldishes.co.uk

Tag Cloud

baking BBC Good Food Show beef Birthday Blogger Blogger Challenge Blogger Event butter Buttercream cake cakes carrot Central Co-Op Central England Co-Operative cheese Chicken chocolate cinnamon Competition Cream Dinner Family meal flour fondant Food Food Blogger Food Review garlic ginger Giveaway Kenwood lemon Meal Meat onion potatoes PR Rapeseed Oil Recipe Review sugar Uncategorized vanilla vegetables Wine

Previous posts

  • June 2020 (1)
  • February 2020 (1)
  • October 2018 (1)
  • April 2017 (2)
  • November 2016 (9)
  • October 2016 (3)
  • September 2016 (2)
  • July 2016 (1)
  • June 2016 (7)
  • May 2016 (2)
  • April 2016 (2)
  • March 2016 (2)
  • February 2016 (3)
  • January 2016 (3)
  • December 2015 (2)
  • November 2015 (3)
  • September 2015 (1)
  • August 2015 (1)
  • July 2015 (5)
  • June 2015 (4)
  • May 2015 (4)
  • March 2015 (4)
  • February 2015 (7)
  • January 2015 (2)
  • December 2014 (6)
  • November 2014 (11)
  • October 2014 (10)
  • September 2014 (6)
  • August 2014 (6)
  • July 2014 (4)
  • June 2014 (7)
  • May 2014 (4)
  • April 2014 (5)
  • March 2014 (3)
  • February 2014 (3)
  • January 2014 (6)
  • December 2013 (8)
  • November 2013 (5)
  • October 2013 (10)
  • September 2013 (5)
  • July 2013 (1)
  • June 2013 (3)
  • May 2013 (6)
  • April 2013 (2)
  • March 2013 (2)
  • February 2013 (1)
  • January 2013 (1)
  • November 2012 (1)
  • October 2012 (3)
  • September 2012 (1)
  • August 2012 (4)
  • July 2012 (10)
  • June 2012 (9)
  • May 2012 (4)
  • April 2012 (2)
  • March 2012 (2)
  • February 2012 (2)
  • December 2011 (2)
  • November 2011 (1)
  • October 2011 (4)
  • June 2011 (3)
  • May 2011 (1)

Follow Me here too

Facebooktwitterpinterestinstagramflickrmail

Subscribe to Blog via Email

Enter your email address to subscribe to my blog and receive notifications of my new posts by email.

Categories

Copyright © 2025 · Foodie Pro Theme by Shay Bocks · Built on the Genesis Framework · Powered by WordPress

This website uses cookies to improve your experience. We'll assume you're ok with this, but you can opt-out if you wish.Accept Read More
Privacy & Cookies Policy
Necessary Always Enabled