Freycob

"Good Food Made Easy"

  • Home
  • Recipes
    • Bread and Pastry
    • Cakes & Muffins
    • Chutneys, Jams, Relishes and Sauces
    • Desserts & Puddings
    • Drinks
    • Fish
    • Main Meals
    • Soups, Starters and Snacks
    • Sweets and Teatime Treats
    • Veg on the side
  • Reviews
    • Book Reviews
    • Equipment
    • Events
    • Food & Drink
    • Products
    • Restaurants
  • Competitions & Giveaways
  • Who is Freycob?
  • Contact Me
  • Privacy & Cookies Policy

Rhubarb, Apple & Ginger Crumble

25th June 2014 by Freycob

My rhubarb is a little pathetic this year; yielding a measly 4 sticks, which is not really enough to make a crumble for a family of 4. Not to be deterred, I grabbed a couple of dessert apples from the fruit bowl and a jar of crystallised ginger from the cupboard and whipped up a pudding in less than an hour (and that included washing up!) I think that rhubarb and ginger are a perfect combination, and judging by the empty bowls all round, my family think so too.  Some of the ingredients I didn’t measure out personally, but to help you, I’ve given you the approximate quantities that I used for the fruit base.

4 sticks Rhubarb
2 dessert Apples
3 balls crystallised ginger
2tbs (rounded) Soft dark brown sugar
Crumble
200g Self raising flour
100g Unsalted butter
100g Soft dark brown sugar
2tsp Ground ginger

1. Preheat your oven to 180C.
2. Peel and slice the rhubarb into 1.5cm slices.
3. Dice the apples into 1cm cubes.
4. Chop the crystallised ginger quite finely.
5. Place the rhubarb, apples, ginger and sugar into a saucepan with 30ml cold water.
6. Bring to a gentle boil, then simmer for about 10 minutes until the fruit has started to soften and release their juices.
7. In a food processor, blitz the flour, cold butter, sugar and ground ginger until it resembles breadcrumbs.
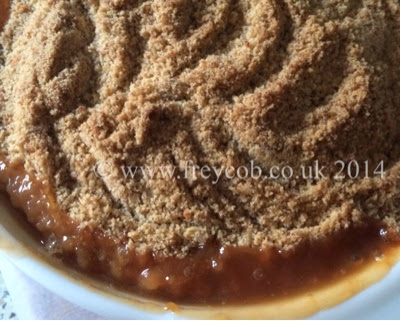
8. Pour the fruit into a heatproof dish and top with the crumble mix.
9. Bake for 25-30 minutes until the top is golden.


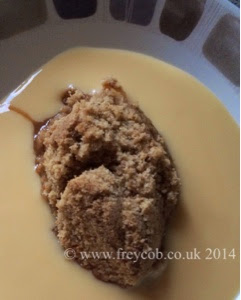
Serve with cream, custard, clotted cream or ice cream. I love the fruity ‘jam’ that mixes with the edges of the crumble mix as it bubbles though.  Enjoy!

Filed Under: Clotted Cream, Cream, Crystallised ginger, Custard, dessert, ginger, Ice cream, pudding, Recipe, Rhubarb, Soft Brown Sugar

Stir up Sunday to make your Christmas Pudding

24th November 2013 by Freycob

Stir Up Sunday is the traditional time to make your Christmas Pudding.  It’s an Anglican tradition which takes place annually on the last Sunday before advent; a time when families would gather round to make their Christmas Pudding and each take a turn at stirring the mixture whilst making a wish.  This year it’s today, 24th November.  Tradition also dictates that a ‘silver sixpence’ should be put into the mixture for one lucky recipient to find.  Finding the coin would bring them health, wealth & happiness.  In accordance with the Gospel, to represent Christ & the disciples, at least 13 ingredients would be used to make the pudding.
I was invited to take part in Tate & Lyle’s “Bake, Eat & be Mary” Christmas campaign to encourage people to make their own Christmas puddings and to spread the word of Stir Up Sunday, as statistics now tell us that over 70% of people now buy them rather than make their own.  I went to London for the photo shoot, which I can only say was pretty surreal; to hear the name Mary called out and 12 women who all have Mary as their name or in their name respond, was, to say the least, quite strange.  New friendships were made over bubbles & nibbles and everyone had such a fantastic time creating our own individual photographs as well as our table of Mischief you can see below.
If you pop over to the Tate & Lyle website you will find the links to 10 of the Mary Christmases’ recipes and stories (including mine). Just click on our pictures to open up the recipes.
 
This recipe I used is from my mother’s 1958 Household Encyclopaedia.  It makes 6 decent sized puddings, which, if kept properly, will not only see you through the festive period with a couple to wrap & give away as gifts, but will also provide a tasty pudding for a few months to come.
2lb Currants
2lb Raisins
1lb Sultanas
1lb Soft brown sugar
4oz Candied Peel
2 Lemons, juice & rind
4oz Brandy (dark alcohol, I use rum)
4oz Port
1 Nutmeg, grated
4oz Almonds, chopped
1/2oz Mixed spice
1/4tsp salt
10 Eggs, medium sized
1lb Plain flour
1lb Bread crumbs
2lb Suet
Milk to mix
Butter for greasing the bowls
1. In a large mixing bowl, combine all of your fruit, sugar, peel, lemon juice & rind and alcohol.
2. Cover with cling film and leave to infuse overnight.
3. Next day, add the grated nutmeg, chopped almonds, mixed spice, salt and eggs, along with the flour, bread crumbs and suet.
4. Stir well to combine all the ingredients.  Add some milk if the mixture is too stiff.  It shouldn’t be a wet batter but should hold its own shape.
5. Grease the inside of your pudding bowls well with butter & place a disc of parchment paper in the base to ease removal.
6. Pack the pudding mixture into the bowl, leaving about 1/2″ (1cm) space.
7. Pleat a circle of parchment paper into a double fold, as pictured, and place on top of the bowl. The pleat will allow the pudding to expand & rise a little during steaming.
8. Pleat a piece of foil and place over the top of the parchment.
9. Tie the parchment and foil in place firmly with string, using the string to make a looped handle to enable you to lift the pudding more easily into and out of the steamer.
10. Bring a pan of water to the boil.
11. Place the pudding basin into your steamer basket and put this on top of your pan of boiling water.
12. Place the lid on top and steam for 9 hours. Keep an eye on the water level and top up the saucepan as necessary with boiling water from the kettle. (Alternatively, to use a slow cooker, place your pudding basin in the crock pot, fill up to 2/3 of the way up the basin with boiling water, place the lid on and cook on HIGH for 10-12 hours or overnight.  Cooking this way has the advantage of having much less evaporation of the cooking water so you can go to bed/get on with your day whilst it cooks itself).
13. When cooked, remove from the steamer and leave until cold.
14. Remove the string, foil and parchment and pour over some more alcohol of your choice and cover with a fresh piece of parchment and then a foil covering.  I tie this on to keep out the air and therefore prevent the puddings drying out.
15. ‘Feed’ the pudding weekly with alcohol until Christmas Day, each time replacing the parchment with fresh.
16. On Christmas Day, you can steam the puddings as before for 2 hours.  Alternatively, you can fill the  slow cooker to 2/3 of the way up the side of the pudding basin and cook for 3 hours on HIGH.  If you really want a ‘quick fix’ you could always microwave it in 2 min bursts until heated through, then allow to rest for 1 min before serving.
Thanks to Mischief PR for inviting me to be one of Tate & Lyle’s Mary Christmases – I had a fun filled & wonderful day. Thanks to the staff at Mischief PR and also to our fab photographer, Nathan Pask for encouraging us to be silly in front of your camera lens and then showing the ‘world’ just how daft we were! Laura Sawyer created a beautiful, festive set for us and even found some properly cheesy Christmas jumpers for us to wear, whilst Sandra Bermingham primped and preened our hair and faces.
3.3.3077

Filed Under: Christmas, Christmas Pudding, Laura Sawyer, Mischief PR, Nathan Pask, PR event, pudding, Recipe, Sandra Bermingham, Tate and Lyle

Cherry & Almond Crumble

28th February 2012 by Freycob

Looking for a quick and simple pudding?  Then look no further.  As I was on a course with work today, and my hubby was cooking dinner, I wanted something that was quick and tasty for dessert.  I always have the basics in my cupboards but I also had a jar of pitted cherries that I’d bought in Lidl recently, so put a tasty recipe together in about 5 minutes ready for the oven. (Apologies for the photo quality, it was taken on my phone).

Crumble
110g (4oz) Self Raising flour
60g (2oz) Ground almonds
85g (3oz) Demerara sugar
85g (3oz) Butter, chilled

Filling
680g (24oz) jar (350g/12 1/4oz drained weight) pitted cherries in syrup (Lidl)
30g (1oz) Granulated sugar
5ml (1tsp) Almond extract
10ml (2tsp) cornflour
15ml (1tbs) cold water

1.   Preheat the oven to 180C/350F/Gas 4.
2.   Mix together the flour, almonds and sugar.
3.   Cut the butter into small cubes and rub into the flour/almond/sugar mixture until it resembles bread crumbs.
4.   Drain the cherries, putting the juice into a small saucepan.
5.   Place the drained cherries in the bottom of a 25cm/10″ round dish.
6.   Add the granulated sugar to the cherry syrup and bring to the boil.
7.   Continue to boil for 5 minutes until reduced by a third.
8.   Mix the cornflour with the cold water.
9.   Add the almond extract and the cornflour mixture to the boiling syrup.
10. Continue to boil, STIRRING CONSTANTLY, until thickened.
11. Pour thickened cherry syrup onto your cherries in the dish.
12. Sprinkle your crumble mix over the top evenly.
13. Cook for 30-35 minutes until golden.
14. Remove and serve hot with custard / ice cream / cream according to your preference.

Hope you enjoy this as much as we did this evening.

Rosie
x

3.3.3077

Filed Under: butter, Cherries, cornflour, Cream, Crumble, Custard, dessert, flour, Ice cream, Lidl, Oven, pudding, sugar

Find me here too

Facebooktwitterpinterestinstagramflickrmail

Search Freycob.co.uk

Foodies100 Index of UK Food Blogs
Foodies100
blogl
World Baking Day Ambassador 2013
alldishes.co.uk

Tag Cloud

baking BBC Good Food Show beef Birthday Blogger Blogger Challenge Blogger Event butter Buttercream cake cakes carrot Central Co-Op Central England Co-Operative cheese Chicken chocolate cinnamon Competition Cream Dinner Family meal flour fondant Food Food Blogger Food Review garlic ginger Giveaway Kenwood lemon Meal Meat onion potatoes PR Rapeseed Oil Recipe Review sugar Uncategorized vanilla vegetables Wine

Previous posts

  • June 2020 (1)
  • February 2020 (1)
  • October 2018 (1)
  • April 2017 (2)
  • November 2016 (9)
  • October 2016 (3)
  • September 2016 (2)
  • July 2016 (1)
  • June 2016 (7)
  • May 2016 (2)
  • April 2016 (2)
  • March 2016 (2)
  • February 2016 (3)
  • January 2016 (3)
  • December 2015 (2)
  • November 2015 (3)
  • September 2015 (1)
  • August 2015 (1)
  • July 2015 (5)
  • June 2015 (4)
  • May 2015 (4)
  • March 2015 (4)
  • February 2015 (7)
  • January 2015 (2)
  • December 2014 (6)
  • November 2014 (11)
  • October 2014 (10)
  • September 2014 (6)
  • August 2014 (6)
  • July 2014 (4)
  • June 2014 (7)
  • May 2014 (4)
  • April 2014 (5)
  • March 2014 (3)
  • February 2014 (3)
  • January 2014 (6)
  • December 2013 (8)
  • November 2013 (5)
  • October 2013 (10)
  • September 2013 (5)
  • July 2013 (1)
  • June 2013 (3)
  • May 2013 (6)
  • April 2013 (2)
  • March 2013 (2)
  • February 2013 (1)
  • January 2013 (1)
  • November 2012 (1)
  • October 2012 (3)
  • September 2012 (1)
  • August 2012 (4)
  • July 2012 (10)
  • June 2012 (9)
  • May 2012 (4)
  • April 2012 (2)
  • March 2012 (2)
  • February 2012 (2)
  • December 2011 (2)
  • November 2011 (1)
  • October 2011 (4)
  • June 2011 (3)
  • May 2011 (1)

Follow Me here too

Facebooktwitterpinterestinstagramflickrmail

Subscribe to Blog via Email

Enter your email address to subscribe to my blog and receive notifications of my new posts by email.

Categories

Copyright © 2022 · Foodie Pro Theme by Shay Bocks · Built on the Genesis Framework · Powered by WordPress

This website uses cookies to improve your experience. We'll assume you're ok with this, but you can opt-out if you wish.Accept Read More
Privacy & Cookies Policy
Necessary Always Enabled